Want to get the most out of your players?
Football has always been a team sport.It is very important for the manager and the players to be in complete sync. A team which does not suit the tactics, philosophy or style of a manager will not do particularly well under him. A recent case in point being Jose Mourinho at Manchester United. Even with the wealth of attacking options at his disposal he was unable to make an impact which was expected of him simply because those players did not fit his defensive pragmatic approach.

What most of feel like when we see Sergio Ramos Tearing down the field in the 90th minute even though you’re a goal up.
The same goes for FUT, in order for your team to function at the highest possible potential they must be under your total control. A CB joining the attack when you’re a goal down , or your fastest Attacker defending corners at the near post , there are a lot of scenarios where you can sometimes become distraught over the decisions of your players.


Players like Mats Hummels and Sergio Ramos are notoriously attacking because they have a High Attacking and Medium Defensive Workrates which cause them to push up the field often.
While we have previously focused on Custom Tactics, they affect the entire team.Custom Tactics are used to change the playstyle of the entire team as a unit. In order to change the individual decisions made by the players, we must make use Player Instructions. Player Instructions are an important aspect of dictating how your team will play. You can ensure that your players behave exactly as you want them to and you can establish a near telepathic connection with them.
Player Instructions are also a very important aspect in the pro gaming scene where almost every pro player has a different preference for the instructions. Using and understanding player instructions will ensure that you have an edge over your friends and of course, your FUT Rivals. Player Instructions will without a doubt elevate your game and unlike Custom Tactics they are very easy to recognise, spot and also fine tune to your needs.
Gone are the days where you find yourself trying to dribble through your opponent using Peter Crouch. Once you have set appropriate instructions on him you will be guaranteed to see him on the far post towering above defenders to nod the crosses in.
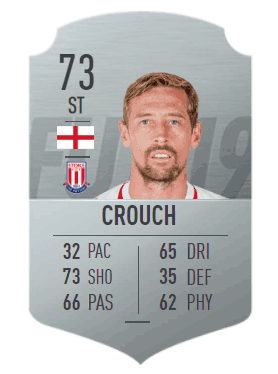
While he is undoubtedly talented, you would have to be a madman to try to use him as anything other than a target man.
Now that we have told you about Player Instructions lets get straight down to business and explain it all to you along with the nitty gritties and advantages and disadvantages of each individual instruction. We have tried to compile a comprehensive and expansive guide that will fulfill all your requirements and instantly elevate your game
All the options available at your disposal
There are a plethora of things you can fine tune to get your tactics just right.These include-
- Attacking Runs
- Attacking Support
- Chance Creation
- Defensive Behaviour
- Defensive Position
- Defensive Support
- Interception
- Position Freedom
- Support on Crosses
- Support Runs
- Run Type
Each different position on the field has different aspects that you can adjust to suit your needs. All these settings seem formidable at first but once you get through this guide you will be at ease with all of these.
We will also explain in detail what everything means and what we think is the optimal setting for you. We will let you know what instructions are available for which positions because you can’t adjust all 11 parameters for each position in the field.
All the different positions in FUT are-
- ST – Striker
- LF – Left Forward
- RF – Right Forward
- CF – Centre Forward
- LM – Left Mid
- RM – Right Mid
- LW – Left Winger
- RW – Right Winger
- CM – Centre Mid
- CAM – Centre Attack Mid
- CDM – Centre Defence Mid
- CB – Centre Back
- LB – Left Back
- RB – Right Back
- LWB – Left Wing Back
- RWB – Right Wing Back
- GK – Goalkeeper *
* NOTE- There are individual instructions for all players except for the Goalkeeper.
Attacking Runs-
This instruction can be changed on 6 out of the 16 positions , they being-
ST, CF, LF, RF, LWB, LB, RB, RWB. They have different uses for the attacking and defensive players.
For the forwards there are 4 options listed under Attacking Runs-
Forwards-
1)Get In Behind- [Make forwards runs in behind the defence]
This will force your Strikers to make deep runs through the defence for you to pick them out with passes or through balls.This should be only used when you have pacey nimble strikers who will have no problem in leaving the defenders chasing their shadows so you can get on a quick one on one with the keeper.
Players like Aubameyang or Gabriel Jesus can be great proponents of this tactic.If you enjoy using such agile pacey strikers then this tactic is made for you.
2)Mixed Attack – [Occasionally make forward runs when the opportunity arises]
This is a more flexible option that some players prefer. This gives you a touch of unpredictability.Your strikers will make occasional forward runs when the opportunity arises and they will sometimes play as target men or come back to the defense to support the midfield in the creativity department. However we don’t suggest that you use this setting even though it is the default . This is because you fail to set in a certain identity to your players and that is what player instructions are all about.
3)Target Man – [Back into an opponent and ask for the ball to feet]
This is a tactic suited to kitchen sink time. Hoofball, as it is referred to is a sometimes looked down upon tactic. In this your strikers will get in the box and ask for the ball. They get into attacking aggressive positions and wait for the ball to come in towards them. This can be brutally effective if you have good , tall, physically imposing Strikers like Romelu Lukaku , Olivier Giroud or even Peter Crouch. Swing in a ball into them from one of your full backs and watch them head the balls into the back of the net. You will however need good wide players to make this work. Wide Forwards can stretch the defense opening up spaces for your Striker to take advantage of, while your full backs will need to have good crossing and curve stats.
4)False 9 – [Drops into midfield to create attacking space for teammates]
If you have creative strikers who can supplement the midfielders to help them create goals then this the perfect option for you. Players like Aguero who can pick a pass and quickly get up the field to get into scoring positions are lethal with this instruction. The ‘Raumdeuter’ – Thomas Muller too is an excellent example of this. Players who play this role need not be excessively gifted physically as long as they have the technical qualities to dribble and pass and make the most of a turnover in the midfield.
Out of these 4 options the first option -’Get in Behind’ is most commonly used because it fits the meta of using quick agile strikers to shred your opponents defence and get an easy 1 on 1 with the keeper. We also suggest that you use this tactic because it gives you the most realistic chance of scoring a goal.
full backs–
1)Join the attack- [ Make forwards runs in behind the defence]
The full backs will try to get forward as much as possible. As soon as space becomes available on the flanks they will rush ahead to occupy them. This is very physically demanding and unless you have elite players with good attacking stats and stamina we don’t suggest that you use this. If you already use a wide formation, this instruction could leave you open to attacks.
2) Balanced attack- [Occasionally make forward runs when the opportunity arises]
The full backs go ahead into wide positions only when space is available. This
ensures that you don’t expose your defense too often.This is quite solid while not overly defensive.
3)Stay Back While Attacking – [Never make forward runs while on attack]
This is the most pragmatic approach. The full backs never get forward regardless of whether there is space available or not.This can sometimes come off as overly defensive. This is suitable if you are defending a narrow lead in the 2nd half
Attacking Support-
This instruction can be changed on 3 out of the 16 positions , they being-
CB,CM,CDM.
For the Midfielders there are 3 options listed under Attacking Support-
Midfielders-
Midfielders
1)Stay Back While Attacking [Never make forward runs while on attack]-
On this instruction, your midfielders will never leave their post to join the forwards in attack. They will stay back and try to disrupt any counterattacks. This instruction is useful when you have slow CDMs like Matic or Fabinho who can’t track back particularly fast.
2)Balanced Attack-[Occasionally make forward runs when the opportunity arises]-
On this instruction, your midfielders aid the forwards when they sense an opportunity. We don’t suggest that you use this on CDMs as that will leave your CBs with no shielding whatsoever, but you can use this on your CMs to give you another dimension to your attack.
3)Get Forward-[Join the attack and make runs beyond the striker(s)]
This allows you to fully utilize your more creative midfielders during a match. This is a risky approach and you could easily become more vulnerable if you use this instructionson your midfielders, especially your CDMs. Use this instruction only on players who have decent attacking threat otherwise you would just be crowdin yourself in advanced positions of the field.
We suggest that you use Balanced attack on your CM or CDMs depending on your preferences and use Get Forward exclusively on CMs who could potentially make a difference in the final third by ripping one into the top corner.
Defenders–
Join the Attack [Occasionally make forward runs when the opportunity arises]
This is a very risky approach and is hardly ever used by pro players. Even if you have good technical defenders who could lay off a few killer passes in the opposing half we don’t suggest that you use this as it leaves a gaping hole in the defensive line.
Stay Back While Attacking [Never make forward runs while on attack]
This is the default instruction on all CBs and is also in our opinion the only one you should consider. 99% of all pro players don’t even touch the instructions on CBs because this is by far the best and most basic and makes sure that the defenders stick to their job .
Play As Striker [Go up front in the last few minutes of a match if losing]
This instruction is probably what Sergio Ramos would use if he played FIFA. When you are chasing the game your defenders make tearing runs through the midfield in hopes of getting to a cross or latching onto a stray pass. While you could manage to come up with an equalizer occasionally we don’t recommend this instruction, simply because the risk significantly outweighs the reward.
Chance Creation
This instruction is available only for 2 positions in FUT- LW and RW. This dictates what kind of runs your wingers make when you are on the attack. This can be exceptionally useful depending on the type of wingers you like to use.
Cut Inside [ Make cutting runs to the inside from out wide]
Using this instruction your wingers almost behave like inside forwards. Anthony Martial and Arjen Robben play this role in real life cutting in onto their stronger foot to let off a shot or play in a pass into the feet of the striker.We suggest that you use this instruction when you have left footed RWs and right footed LWs.If you use such players, you will easily be able to finesse a shot into the top corner.
Balanced Width [ Stay wide or cut inside depending on the situation.]
When you use this instruction, your wingers will make smart runs off the ball when you are on he attack. If the ball is coming into the final third through the middle they will cut in to receive the ball and if the ball is coming through from wide positions , the make runs towards the touchline to stretch the defensive line and try to get a cross in.
We don’t suggest that you use this instruction because you could end up frustrated when your players make the wrong choice and the chance gets wasted.Also hav9ing a set instruction and a proper system always helps and develops a habit.
Stay Wide [ Always try to stay wide and close to the line.]
This is the complete opposite of the Cut Inside instruction.Instead of cutting in, the wide players hug the touchline in attempt to get across in. When wingers go wide, they attract full backs towards them and that gives rise to lots of room that can then be exploited by your other attackers. Also if you have a big target man up front you could easily abuse this instruction by getting wide and putting in a curler for your striker to head in.
Free Roam [ Take a free role and roam the attacking third.]
Philippe Coutinho and Lionel Messi are proponents of this in real life. Instead of sticking to a certain position on the field or making certain types of runs, they drift in between defenders to draw them out of space and make chances for others. This can be really effective if done right, but unfortunately this is very taxing on the stamina and your wingers will be effectively useless past the 70 minute mark unless they have high stamina..
Defensive Behaviour
This instruction is available for only one out of the 16 positions – CDM. The CDM is going to be responsible for shielding your backline from your opponents and if you manage to use your CDM(s) effectively, you have already won half the battle.
Cut Passing Lanes [ Split the opposition and cut out the passing lanes]
This instruction is best used when you have a quick, agile CDM who can quickly recover even if the ball gets past him. Players like Kante excel on this instruction. The CDM will focus on making sure that your opponents have a hard time passing the ball between them in the middle of the field by constantly attempting to intercept passes and by cutting lanes. You should keep in mind that this instruction is taxing on players’ stamina.
Balanced Defence [ Keep your shape and stay in position to defend]
This is commonly used , your players will stick to their position and not commit and go towards the attackers to get the ball , but will instead wait for the attackers to come close to them before attempting a tackle. Players like Matic and Fabinho who are not exceptionally fast are suitable for this instruction owing to their superior strength.
Man Mark [ Mark up tight and stick with your opponent]
When you use man mark, your CDM will choose an opposing player and stick with him.This makes it near impossible for the player to get past the CDM unless he uses skill moves. However because of this , your CDMs will get pulled out of position often and will leave your defence exposed.
We recommend that you use balanced defence and wait for the player to come to you instead of charging at him and risking a goal.In case you want to put pressure on the players use your CMs and let your CDMs stick to their positions.
Defensive Positions
This instruction dictates how your midfield positions itself while defending. This instruction is available for 2 out of the 16 positions- CM and CDM. This instruction is crucial while defending and if you choose the wrong option you will concede goals left and right.
Cover Center [ Always try to defend central positions]
When this instruction is active, your midfielders will focus on the centre and will try to stop all attacks that come through the middle of the field. This is essential while defending against narrow formations.They provide significant shielding against the attackers and make sure that they stay close and compact .
Cover Wing [ Defend the open wing if teammate isn’t marking]
When this instruction is active, your CMs and CDMs will move towards wide positions when the wide midfielders are absent. This ensures that you have an additional man against your opponents wide attackers. They will cover wide positions but will leave you outnumbered in the middle of the pitch.This is best used against wide formations , however it is exceptionally weak to narrow formations which usually dominate the pro competitive scene.
We suggest that you use the Cover Centre option because they will handle most of your opponents’ formations and even in case your opponent uses a wide formation you still have your full backs to deal with them.
Defensive Support
This allows you to call certain players back in your own half when you are defending. This is useful when you are unsure of your players ability to defend against the opponent. In certain matches you might find that the CDM is not enough to defend against your opponents attackers , so you can use some of the attackers who will track back and try to defend.
You can change this instruction for all ‘attacking’ players ,that is – LW,LM,LF,RW,RM,RF,ST,CF and CAM.
Come Back on Defence [ Always try to track back and support the defence
This is the most conservative approach. Regardless of how many players you have to defend against , the player will track back and try to win the ball back. This requires a high amount of stamina and wingers with decent defending stats can really be useful with this instruction.This can be very useful while defending, so we suggest that unless you have a couple of CDMs to shield your backline, use this on at least one of your midfielders.
Basic Defence Support [ Come back to support the defence when needed
This is the default setting. Instead of setting a rigid instruction, the players will fall back and come to defend based on the situation.If you are outnumbered at the back, a couple of your players will come back to help your midfielders and defenders out.
Stay Forward [ Do not come back to support the defence
When this instruction is active , your attacking players stick to their role , that is they remain forward in position to spring a counterattack whenever required. This instruction should be used on players who are not particularly adept at defending. Players like Mahrez and Sterling, who are ineffective defensively but can lead a counter attack with ruthless efficiency are players that are built for this instruction.
Interception
This instruction dictates how your players try to win the ball back. This instruction can be changed for all 16 positions.Different positions have different needs in regards to this instruction.
Aggressive Interceptions [ Always looking to intercept passes aggressively]
When using this instruction, players will always press and try to win the ball back as soon as possible. This is a very effective tactic for winning the ball back. However, it comes with its disadvantages too. This will drastically drain your players’ stamina and may also lead to a number of fouls and cards and you will be forced to make a substitution by the 60-70 min mark.
If you are tempted to use this instruction be sure to keep this in mind. We suggest that you use this instruction only on your Physically gifted CDMs and CMs and not on any other player.
Normal Interceptions [ Looking to intercept passes when the interception chance is reasonable]
This is the default setting and is also the one you should be using on most of your players. Your players do not over commit and will only make an attempt if there is a realistic chance at winning the ball back, otherwise they will sit back and hold their position.
Conservative Interceptions [ Only trying to intercept passes if the player can win the ball clearly]
This is the least aggressive approach but it also has its uses. When you are using players with low stamina you should make use of this instruction as this barely drains players’ stamina. Attacking players who will stay forward should have this on them so that they can last longer in the game and can come clutch in the latter parts of the game.
Positioning Freedom
This instruction dictates your midfielders discipline when it comes to their position.This is available for only 2 out of the 16 positions- CM and CAM.
Free Roam [ Take a free role and roam the attacking third
When this instruction is active, your players will drift through out the pitch and try to create space for himself as well as other attacking players. This drains some stamina because the player is continuously moving throughout the pitch. Players like Messi and Ozil play like this in real life, drifting in between lines to draw defenders out of position. We suggest that you use this only on your CAMs and not on your CMs because if they stray away from the midfield it could leave you open to counterattacks.
Stick to Position [ Stay in your formation position when attacking
This is fairly self explanatory, when this is active players will maintain their positions on the field as specified in the formation. This is very effective because you get used to seeing your players in familiar positions and you get into a habit and develop a proper system.
Support on Crosses
This instruction dictates where your players position themselves when the ball is in crossing positions.This instruction can be changed for 6 of of the 16 positions in FUT –
LM,LW,RM,RW,CM,CAM.
Get Into The Box For Cross [ Make runs into the penalty area in crossing situations]
Again , this is very basic, when the ball gets into wide areas the players will run into the box hoping to get something on the ball and nod it towards goal. This can be useful when you use wingers who get wide and curl in good crosses. This is not very pretty but it gets the job done and isn’t that what FIFA is about.
Balanced Crossing Runs [ Run into the penalty area or stay on the edge in crossing situations]
When this instruction is active, your players will make runs depending on the situation. If there is space in the box that they could exploit they will get into the box or otherwise they will stay on the edge of the box.
Stay On Edge Of Box For Cross [ Stay on the edge of the penalty area in crossing situations]
This tactic is the most used in pro matches in FIFA 19 because of the fact that finesse long shots are so overpowered , we suggest that if you use player who have good long shooting ability like Dybala, De Bruyne or Pjanic you should use this instruction on them and try to get the ball to their feet so they can rip one into the top corner.
Support Runs
This instruction dicatates how your players position themselves, and what kind of runs they make off the ball during possession. You can use this instruction on LW,LM,LF,RW,RM,RF,CF,ST.
Come Short [ Come short and ask for the ball to feet]
When this is active your players will come close to the ball and will give you another passing option.This is useful when you have a slow buildup style of play. Using this you can keep control of the ball and maintain possession.You can use this to stifle the opponent and then spring on the break with your winger once space has opened up.
Target Man [ Back into an opponent and ask for the ball to feet]
This is useful when you have tall strong strikers who are not particularly fast or mobile but are dominant in the air and have decent shooting stats. Players like Giroud are suited for this as using this instruction they will position themselves in the box such that they can receive the ball and immediately get a shot off or nod a cross into back of the net.
Drift Wide-[Drift wide into space to stretch the defence]
When this instruction is active your strikers will try to get in behind by making runs in between your opponents CB and Fullback. This will force your opponent to either pull his CB out of position or use his fullback to defend, this can create space for your other players to exploit.
Get in behind
When you use this instruction on your wingers, they will make it a point to peel off their defender on every attack and try to latch onto a long ball played to them. Fast , agile wingers like Sterling, Sane can easily get past any defender owing to their 90+ pace.
Run Type
This instruction is reserved exclusively for your full backs , that is LB, LWB,RB AND RWB.
It allows you to choose what kind of runs they make while attacking.
Inverted [ Make underlapping run on the inside of the wide players for more central support]
When you activate tis instruction, your full backs will make forward runs through the channels between the wide and central midfielders instead of going wide. This allows you to maintain possession as you can have a lot of short passing options with the ball at your feet.
Mixed Attack [ Occasionally make forward runs when the opportunity arises]
When this is active, players make forward runs, but only when there is a clear opportunity to hurt the opponent on the counter.
Overlap [ Make overlapping run on the outside]
The players will run forwards but will hug the touchline to stretch the defence and create space for the other players to exploit.
We suggest that you stick to Mixed attack to keep your opponent guessing and make his life harder when it comes to defending. However depending on your playstyle you could also prefer the Overlap option. This is also quite effective if you have fast full backs who can put in a good cross.
This concludes our Player Instruction guide, we hope that you found this useful and we wish to see you implement these in your game and get better at FIFA. While we can write about these in theory all we want, but you will obviously learn what these instructions do when you use them in the game.
You can pair these instructions together to create your own system and design your own approach to a game. However try to use compatible combinations- asking your wingers to get in behind and into crossing positions while you use Gabriel Jesus as your striker will not work very well regardless of how good you are.
Keep in mind , that there are a lot of videos on YouTube that show you Pro Players instructions and other tactics, but it is best if you only use them as a basis and not copy them exactly. After all, you should change your tactics to suit your game style and not your game style to suit someone else’s tactics.
All this being said, we have no doubt at all that mastering player instructions can easily help you gain AT LEAST one rank tier in the Weekend League and once you have established a system that you are comfortable with , you will be very hard to beat.
We wish you all the best and hope that you completely thrash your opponents and induce a ton of rage quits.